Boatbuilding: Cockpit Coaming & Rubrails
The kayak project is in the final stages. All that's left to do is cut and install the cockpit coaming and rubrails and add a few extras to personalize it a little. That doesn't sound like much but since the parts are being cut out of larger material and will require a bit of fitting and finishing I'm going to cover the final stage in two posts. This one covers construction, installation and finishing of the coaming and rubrails. The next one will cover the rest including some final thoughts about the entire project.
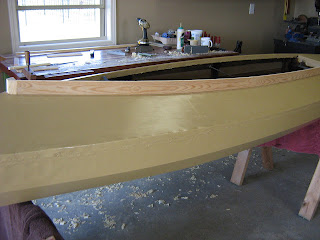
The coaming is the raised frame around the cockpit opening. While it does add a little style to the kayak its main purpose is to keep water out of the cockpit. So far I've used yellow pine for everything except the cross frames, so I'm sticking with it and also using it for the coaming and rubrails. The rubrails are 3" wide and a little over 1/4" thick. I made them by slicing a 1x4 pine board down the middle on the table saw and ripping it to width.
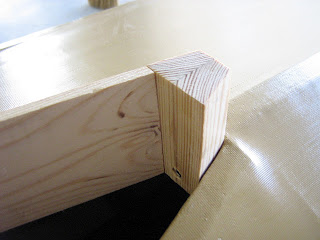
The coaming slats are attached flush with the bottom of the cockpit carlins and the ends should meet at the forward end of the cockpit. I left too much space between the front ends of the carlins when I fastened them to the cross frame. So, I can't join the ends of the coaming according to the plans. To solve the problem I made a stop out of pine for the coaming to rest against. After I cut them to fit the stop I decided I didn't like it. But I didn't want to start over with the coaming so I decided to stay the course. I did put an additional corner block between the ends to increase the gluing surface.
The rear end of the coaming extends a few inches past the backrest. A contour will be cut to let the ends taper into the rear deck.

Once both of the coaming slats are cut they are temporarily clamped in place. Now I can back away a little and decide how to contour the ends.

I drew a simple taper on a piece of scrap wood, cut it out and used it as a template to mark the ends of the coaming slats. You could use your imagination to cut all kinds of cool decorative endings on the coaming if you wanted to. Just seemed like the overall style of the kayak needed something simple.

In the leftovers from cutting the coaming I found a piece of pine with a neat grain pattern long enough for the backrest. I cut the board to center the pattern and the top corners were rounded over to blend with the coaming ends.

I'm using #8 brass screws 1" long and brass finishing washers to hold things in place.

With the coaming and backrest in place I cut two rubrails 16' long. The rubrails are 1 1/4" wide and a little over 1/4" thick. Both were cut out of a 16' yellow pine two by four on the table saw. The plans call for the rubrails to be 3/4" wide. To me the wider rubrails look better with the height of the coaming.

The rubrails are cut slightly long and clamped in place. The ends are cut off with the pull saw.

I marked the locations for all the screws and pre-drilled the holes before cutting the ends to size.


After all the trim was dry fitted I took it off and stained it with the same mix I used on the frame and floorboards. I used two coats of spar varnish as a topcoat. The brass fasteners really compliment the antique stain color.

When I originally installed the rope handles I was planning on using a 3/4" wide rubrail. When I changed my mind and went to 1 1/4" I realized the rubrails would have to be notched around the rope. I didn't like that so I cut the rope handles and drilled holes into the rubrails to line up with the original holes I drilled for the rope. The new rope handles will be attached a little differently and the look will be much cleaner.

OK, painted, stained and topcoated. Need to install new rope handles and put some art on the sides. Next post covers it.

Comments
Post a Comment